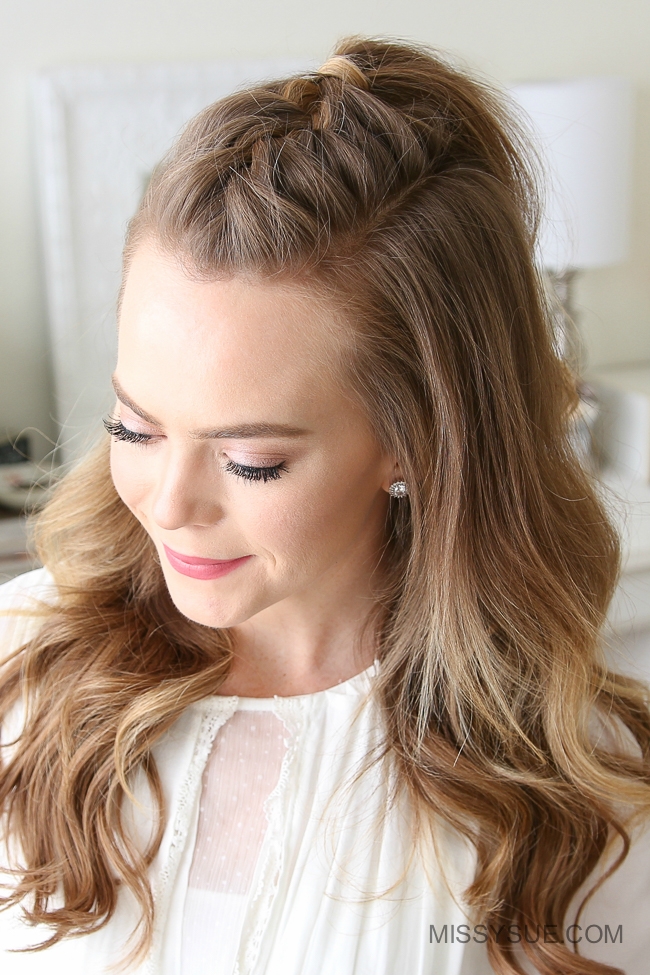
Over Thanksgiving weekend, my friend was asking me how to create this French Mohawk Braid. Since half up hairstyles are some of the most requested tutorials I thought it’d be perfect to share a tutorial with you as well!
This is a simple yet edgy style and a fun way to elevate your favorite everyday curls. I hope you enjoy the tutorial and be sure to let me know what you think! Thank you so much for watching! xoxo, Missy
French Mohawk Braid Supplies:
- Rattail comb
- 2 Hair sectioning clips
- Clear elastic
- 2 Bobby pins
French Mohawk Braid Instructions:
- Step 1 / Begin by dividing out a section of hair for the braid so create two parallel part lines at the corners of the forehead and clip down the bottom hair.
- Step 2 / Pick up a small section near the hairline and divide it into three smaller pieces for the braid.
- Step 3 / I’m going to start by crossing the right strand over the middle and then the left strand.
- Step 4 / Now cross the right strand over the middle, pick up a new section and add it into the middle strand.
- Step 5 / Then cross the left strand over the middle, pick up a new section and cross it into the middle strand.
- Step 6 / Repeat these steps crossing the side strands over the middle strand while bringing new sections into the braid until it reaches the crown of the head.
- Step 7 / Tie off the end of the braid with a clear elastic band.
- Step 8 / Then to hide the elastic, divide out a small section of hair, wrap it around the elastic band and pin it underneath with a bobby pin.
- Step 9 / Gently back comb the ponytail a little bit to add some volume.
- Step 10 / Spritz the ponytail with some hairspray for hold and smooth down any flyaways.


Recently, I’ve been getting a lot questions about how I curl my hair.
For today’s tutorial I’m happy to be letting you in on my most basic of secrets and sharing the super simple way that I curl my hair. I am using a 1 1/2″ curling iron in this tutorial and also love to use a 1″ and 1 1/4″ curling iron as well. The technique is always the same and I’ve been doing it this way for years.
I hope you enjoy the tutorial! Be sure to let me know what you think!
Thanks so much for watching! xoxo, Missy
Easy, Everyday Curls Supplies:
Easy, Everyday Curls Instructions:
Prep: To prep my hair, I always wash my hair at night and let it air dry. After towel drying it, I apply a pea size amount of the Kerastase Leave-in treatment. My hair is super dry so this helps keep it from getting tangled up and makes it really soft after it’s dried.
- Step 1 / Before I start curling my hair I always divide it into sections. I split it in half at my ears and use a little claw clip to pin up the top hair.
- Step 2 / Then as a heat protectant I spray the hair with the Kenra Hot Spray.
- Step 3 / Next I pick up a small 1″ section of hair and clamp the curling iron near the top. Then slide it down to the middle of the section and roll it back up to the root. I do this to smooth the hair at the root and then just wait a few seconds before dropping the iron down near the ends and then roll it up a second time.
- Step 4 / After a few seconds I’ll drop out the top half and pull the curl out a bit to keep the wave soft and more loose. I also make sure to leave the very ends out of the iron so they stay more straight. Sometimes I’ll drag the iron over them to make sure they’re not too curled.
- Step 5 / Then I just repeat those same steps with the rest of my hair on this bottom section.
- Step 6 / Once all of the hair from the first layer is curled, then I’ll let down the next layer and repeat the same steps curling all of my hair away from the face. Sometimes I’ll alternate the direction of the curls so they don’t stick together. Or sometimes I’ll curl just one or two pieces on each side of my head so that I can get more of a carefree, undone vibe.
- Step 7 / Then with the hair right around my face I like to make sure the bend of the curls lines up with my chin. This is the perfect spot for my face shape but it can also work to line it up with the cheekbone. You just have to try it out and see what works best for you.
- Step 8 / Then to set my curls I will lightly mist them with the Kenra 13 hairspray. This is a medium hold hairspray so it gives my hair a tiny bit of texture without feeling sticky or stiff.


Original article and pictures take missysue.com site


Комментариев нет:
Отправить комментарий